Journal entry
Clamp On MacBook Mount: What Actually Works

A bad clamp on MacBook mount usually fails in one of two places. Either the clamp is fine but the laptop sits in the wrong spot, or the laptop placement is right but the whole thing looks like an afterthought bolted onto an expensive desk.
That matters more than people admit. If you use a MacBook in clamshell mode with an external display, keyboard, and mouse, the laptop itself becomes infrastructure. It needs to be out of the way, easy to dock, and stable enough that you stop thinking about it. That is the actual job of a mount.
What a clamp on MacBook mount is supposed to solve
Most people start with the wrong comparison. They compare a clamp mount to a stand. But a stand still gives the laptop a visible footprint on the desk. It still eats depth. It still leaves you with cable slack and a machine you need to work around.
A clamp on MacBook mount is solving a different problem. It moves the laptop off the working surface without asking you to drill into the desk or wall. That makes sense if you rent, if you switch desks, or if you want a cleaner setup without committing to hardware underneath the desktop.
The real test is simple. Can you dock the MacBook once, close it, and forget it is there? If not, the mount is just a fancier version of desk clutter.
Where clamp mounts go wrong
The first issue is clamp geometry. Plenty of generic mounts use a one-size-fits-all clamp that technically attaches to a desk edge but puts the laptop too low, too far out, or too close to your leg space. On paper it fits. In practice it interrupts the desk line and catches your eye every time you sit down.
The second issue is pressure in the wrong place. A MacBook is rigid, but it is still a thin aluminum device with ports on the sides and thermal behavior that changes depending on orientation. If a mount grips too hard, covers the wrong area, or forces the machine into an awkward angle, you get a solution that feels improvised.
The third issue is cable behavior. This is the part generic product listings almost never show honestly. A mount can hold the machine perfectly and still be annoying if the cable has to bend sharply, stick out into view, or pull against the port every time you move the desk.
That is why the mount and the docking method should be thought about together. If your cable path is bad, the setup is bad.
Edge clamp vs under-desk mount
If you are specifically searching for a clamp on MacBook mount, what you usually want is an edge-mounted solution. The reason is obvious. No drilling, fast install, and easy access from the side of the desk.
That said, edge-mounted is not automatically the cleanest option. It depends on your desk, your chair position, and where your cables enter the setup.
An edge clamp makes the most sense when you want quick access to the laptop, when the desk has a usable front or side lip, and when you do not want anything permanently attached under the desktop. It is also a good fit if you change desk layouts often.
Under-desk mounting is cleaner when your priority is making the laptop disappear completely. It is usually the better visual result. But it is a different install approach, and it asks more from desk thickness and clearance.
If your setup goal is a true one-cable desk with the machine fully out of sight, an under-desk option like the SlideUnder Pro often makes more sense than forcing a clamp solution into a setup that really wants the laptop hidden. The point is not that one is better in general. The point is that placement should match the desk behavior.
When a clamp on MacBook mount makes sense
A clamp on MacBook mount is the right tool when your desk edge is accessible, your monitor is doing the main visual work, and you want the laptop nearby but not on the desktop. For a lot of home office setups, that means mounting on the left or right edge near the back corner.
That is exactly why the SlideEdge line exists. The SlideEdge Standard and SlideEdge Pro are edge-of-desk mounts built around that use case, with left and right variants so the machine sits where your cable routing actually works instead of where a generic bracket happens to allow it. If you know your dock or monitor cable enters from one side, side-specific mounting matters more than people expect. It reduces cable bend, shortens the visible run, and makes docking less fiddly.
The Pro version makes the most sense if the desk edge or daily use asks for a bit more structure. The Standard version works if your setup is simpler and the goal is just getting the machine off the desk cleanly. Either way, the benefit is not abstract. You reclaim desk depth without hiding the laptop somewhere awkward.
You can see the edge-mounted approach here: https://dockedbydesign.com/products/slideedge-pro
Desk thickness changes everything
This is the boring detail that decides whether a clamp mount feels solid or compromised.
A thin tabletop is easy for most clamps. A thick desktop, a beveled edge, or a sit-stand desk frame close to the edge is where things get more specific. The clamp has to clear the desk shape, apply pressure where it should, and leave enough room for the laptop body without creating a weird offset.
If your desk has a metal apron, a rounded underside, or an edge profile that is not flat, you should not assume a generic clamp will behave well. This is also where custom work matters. Some desks look standard from above and become annoying only when you measure the underside. That is the kind of detail that gets missed in mass-market hardware.
For non-standard setups, asking about a custom build is smarter than buying twice. A desk mount is not complicated, but the geometry needs to be honest.
Docking matters as much as mounting
A mount is only half the system. If you are pulling power, display, storage, and peripherals through the MacBook, your cable needs to match the setup.
This is where people accidentally sabotage a clean desk. They spend time mounting the laptop off the surface, then connect it with a cable that is too stiff, too slow, or too visually messy for the route. Now the mount is clean but the desk edge still looks busy.
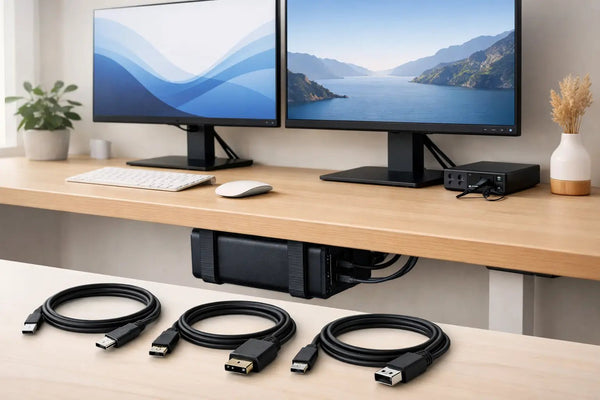
If your goal is dock once, connect everything, a proper USB4 cable matters. The SlideLink Pro USB4 80Gbps cable is built for exactly that kind of setup, where the MacBook goes into a fixed mount and the cable path needs to stay controlled. High data throughput is one part of it. The less obvious part is physical behavior. A cable that routes cleanly and stays where you want it makes the whole setup feel intentional.
That product is here: https://dockedbydesign.com/products/slidelink-pro-usb4-80gbps-cable
The trade-off with clamp-mounted access
A clamp mount keeps the laptop accessible. That is good if you still open the MacBook sometimes, swap ports, or want the machine within reach. It is less good if your only goal is invisibility.
That is the trade-off. Edge mounting is easier to install and easier to live with if you interact with the laptop. Under-desk mounting is visually cleaner if you do not. Neither is universally better.
There is also the legroom question. A side-mounted clamp usually avoids this. A front-edge mount can create a visual interruption or bump risk depending on where you sit. On a wide desk, you may never notice. On a compact desk, a few inches matter.
Cases, skins, and other fit problems
This is the part people hate hearing, but it saves time. A mount designed around actual MacBook dimensions will not love a thick shell case.
That is not a flaw. It is the point. A precise fit holds the machine properly and keeps the whole profile tighter to the desk. Add a bulky case and the tolerance disappears. If you run a skin, that is usually less of an issue than a hard shell. But if your MacBook lives in armor, you should check fit before assuming any mount will accept it.
The same goes for heavily protruding adapters. If you rely on a dongle that sticks out permanently from one side, that changes how and where the machine can sit. A clean mount works best when the cable plan is simple.
What to check before you buy
Measure your desk edge thickness. Check for a frame, bevel, or lip underneath. Decide which side your cable should enter from. Then decide whether you need access or invisibility.
Those four checks tell you almost everything. If the laptop should stay reachable and your desk edge is usable, a clamp on MacBook mount is usually the right direction. If the edge is awkward or you want the machine completely gone, under-desk is probably the better answer.
The mistake is treating all mounts as interchangeable. They are not. The difference is not branding. It is placement logic, fit, and cable routing.
A good desk setup feels quiet. Not empty for the sake of it. Just resolved. When the laptop has one place to live, the rest of the desk starts making sense around it.