Journal entry
9 MacBook Cable Management Ideas That Work

A clean Mac desk usually falls apart in the same place. Not the monitor. Not the keyboard. The cable mess starts when the MacBook stays on the desk, half-docked, with power, display, SSD, audio, and charger leads all fighting for the same small patch of space. Good macbook cable management ideas fix that at the source, not with more clips stuck around the problem.
Start by removing the laptop from the cable zone
If the MacBook sits open beside your monitor, every cable has to travel to the most visible part of the desk. That creates overlap, slack, and the usual loop of cable hanging off the front edge.
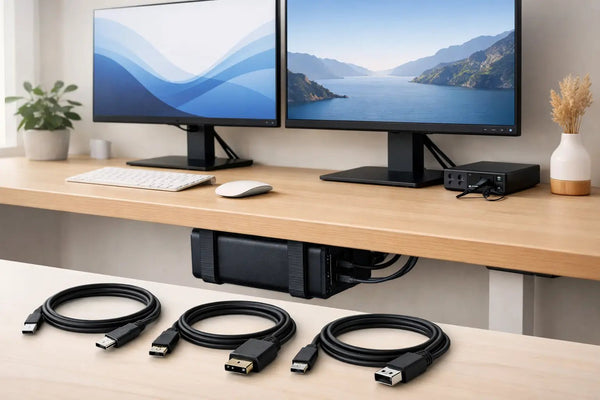
The cleanest fix is to move the laptop itself out of sight. Under-desk mounting works well because it shortens cable runs and clears the top surface at the same time. If you're running a MacBook Pro 14 or 16, or you have a thicker desktop or sit-stand frame to work around, the SlideUnder Pro Crossbar Edition is built for that kind of setup. It mounts the machine under the desk instead of asking the desk to share space with it. Product page: https://dockedbydesign.com/products/slideunder-pro-crossbar-edition
That changes the cable problem immediately. Power, display, USB, and audio can all route downward or backward instead of spreading across the desk like roots.
There is a trade-off. Under-desk mounting is for people who mostly use their MacBook closed and docked. If you open the laptop constantly during the day, edge mounting may make more sense.
MacBook cable management ideas work better when you pick one cable path
Most bad setups have no routing logic. One cable goes left, another goes right, and the charger drops straight off the front because it was easiest in the moment.
Pick one path and commit to it. Usually that means everything runs to the rear corner nearest your power strip or dock. Once you do that, cable length starts making sense. You stop needing extra loops just to compensate for random direction changes.
This matters more on smaller desks. On a 47-inch desk, one extra loop of USB-C cable can take up the same visual space as your mouse area. On a larger desk, the mess just spreads out and looks less concentrated. It's still there.
If your desk can't support under-desk mounting, an edge-mounted solution keeps the MacBook off the worksurface without forcing long cable runs. The SlideEdge Pro does exactly that. It holds the MacBook at the desk edge, so cables can drop straight down the side instead of crossing your desktop first. Product page: https://dockedbydesign.com/products/slideedge-pro
Stop solving clutter with longer cables
A lot of setups get worse because the wrong cable length is doing all the work. Too short, and connectors pull tight when you move the laptop. Too long, and you end up coiling the slack into a visible knot.
The right approach is boring. Measure the path from the MacBook to the dock or monitor, then add just enough slack for desk movement and connector strain relief. That's it. Not an extra three feet because it might be useful later.
This is especially true with sit-stand desks. They need a service loop, but only in the vertical section where the desk moves. The rest of the run should stay controlled. If the loop is hanging beside your knees, it's too long or in the wrong place.
A single-cable docked setup is the real upgrade
Most cable management advice deals with symptoms. Clips. sleeves. trays. ties. Those help, but they don't reduce cable count.
The biggest improvement usually comes from getting your docked setup down to one connection at the laptop. One cable in, everything else handled through that line. Power, display, peripherals, storage.
That's where a proper USB4 cable matters. A cheap USB-C cable might charge the MacBook and fail the moment you ask it to carry high-speed data and an external display at the same time. Then people start troubleshooting the monitor, the dock, or macOS when the cable was the weak point all along.
The SlideLink Pro USB4 80Gbps cable is built for exactly this job - a single-cable desk where the MacBook docks once and the rest of the setup stays put. Product page: https://dockedbydesign.com/products/slidelink-pro-usb4-80gbps-cable
One cable is easier to route, easier to hide, and harder to snag. It also changes the daily habit. Sit down. plug in once. done.
Hide cables where the desk already gives you cover
You don't need to wrap every wire in a sleeve to make a desk look clean. Most desks already have natural sightline breaks. The back edge. The underside. The leg nearest the wall. Use those first.
Run cables along the underside of the desk before they ever become visible from a seated position. Then bring up only what needs to surface - usually one monitor cable, one keyboard cable if it's wired, and your dock connection. Everything else should stay behind the visual line.
If your monitor arm has a built-in cable channel, use it. If not, route behind the arm rather than beside it. Cable management is mostly about what you can see from normal angles. The cleanest path on paper is useless if it creates a visible bundle in real life.
Don't stack adapters on the desk if they can live underneath
One ugly part of many MacBook setups is the adapter pile. USB-C hub, SSD, card reader, charger brick, Ethernet dongle. The desk ends up holding a little island of accessories because each one solves a real problem.
That doesn't mean they all need top billing.
Anything you plug in once and leave there should move below the desktop or behind the display. The only things worth keeping visible are the items you touch often. Maybe an SD card reader if you ingest photos every day. Maybe audio controls. Everything else can disappear.
This is where a mount helps more than a stand. Stands elevate the laptop but keep all the connections in sight. A mount changes the geometry of the whole desk.
Separate permanent cables from temporary ones
This is one of the simplest macbook cable management ideas, and it's the one most people skip. Not every cable deserves the same route.
Permanent cables are your monitor, dock, power supply, speakers, Ethernet, and anything else that stays connected for weeks. Temporary cables are phone charging leads, camera cables, SD readers, portable SSDs, and whatever else appears for a task and then goes away.
If you route those two groups together, your clean setup breaks every time you need to plug something in. Keep the permanent ones hidden and fixed. Give temporary cables a deliberate landing spot near the front or side of the desk. One visible charging cable in the right place looks intentional. Three hidden ones pulled loose from the back do not.
Cases, skins, and desk thickness change what fits
This part matters because generic setup advice usually ignores it. A mount that fits a bare MacBook may not fit the same machine in a hard shell case. A desk with a thick edge or reinforcement beam can also block certain mounting styles.
So before you buy clips, trays, and organizers, decide what the laptop's final position will be. Under the desk, at the edge, or on the wall. Then check the physical constraints around that spot.
If your setup is non-standard, a custom build is often the cleaner answer than forcing a close-enough product into place. Sunny designs and prints these mounts himself, so custom desk depths or odd clearances are not theoretical edge cases. They come up all the time.
Wall mounting works when the desk itself is the problem
Some desks simply don't give you enough underside room. Metal frames get in the way. Drawers take the useful space. Maybe the desk sits in the middle of a room and the cable exit needs to happen elsewhere.
In those cases, wall mounting can be cleaner than trying to win a bad under-desk fight. The SlideWall moves the MacBook off the desk entirely and gives you a fixed point for cable routing beside or behind the workspace. Product page: https://dockedbydesign.com/products/slidewall
The trade-off is obvious. Wall mounting is less flexible if you change your desk position often. But if the desk stays put, it can produce the cleanest result of all because nothing needs to live on or under the top.
The best-looking setup is usually the one with fewer decisions
People overcomplicate cable management because they treat every wire as its own problem. It usually isn't. Most of the mess comes from one decision left unresolved: where the MacBook should live when it's docked.
Get that right first. Then route around it with one cable path, the right lengths, and a clear split between permanent and temporary connections. The desk gets quieter fast.
If you're still staring at the same tangle every morning, don't buy another pack of clips yet. Move the laptop out of the way, and the rest of the setup usually starts behaving.