Journal entry
3D Printed MacBook Mounts That Make Sense

A bad laptop mount creates a new problem. The MacBook is off the desk, but now the dock cable is stretched, the lid hits the frame, or the mount flexes every time you plug in. That’s why a 3d printed macbook mount only works when the design starts with the actual desk, actual port access, and the exact shape of the machine.
That sounds obvious, but most mounts are still treated like generic accessories. They’re not. A MacBook mount is a fit problem first, then a desk layout problem, then a materials problem. Get those in the right order and the setup feels invisible. Get them wrong and you notice it every day.
What a 3d printed macbook mount needs to do
The job is simple. Hold the laptop securely. Keep it accessible enough to dock without a fight. Stay out of sight. Not scratch the machine. Not wobble. Not block airflow in a dumb way.
Those requirements push the design in different directions. A mount that hides the MacBook completely under the desk looks clean, but only if your cable routing is sorted. A desk-edge mount gives easier access, but it becomes part of the visible setup, so the proportions matter more. A wall mount frees the desk entirely, but only if the wall position makes sense for your cable length and daily reach.
This is where 3D printing actually makes sense. Not because it’s trendy. Because it allows model-specific geometry, small-batch refinement, and tolerance control that matters in a part built around a premium device. If the print is calibrated properly, the mount can follow the machine closely instead of relying on oversized universal gaps.
That last part matters more than most people expect. Loose fit looks cheap. Over-tight fit is worse. If the mount is printed and checked to under 0.1 mm calibration, you can design for a close fit without making insertion annoying.
Why 3D printing is the right method here
Injection molding is great when you need tens of thousands of identical parts. A MacBook mount is usually not that product. Desk thickness varies. Orientation varies. Left and right access matters. Some people want the laptop under the desk, others want it tucked against the edge, and others want it on the wall behind a display.
A 3d printed macbook mount can be designed around those differences without turning into a compromise piece. That’s the practical advantage. You can build a part for a specific use case instead of forcing every setup into one shape.
It also makes iteration faster. If a desk edge clamp needs better clearance for a lip, or a slide path needs adjusting, that change happens in the design file and the next print. That’s very different from the usual accessory market where a product gets locked early and stays wrong for years.
Of course, 3D printing is not magic. A poorly printed part is still a poorly printed part. Layer lines, bad tolerances, weak orientation, and inconsistent finishing all show up fast when the product is mounted next to expensive hardware. The process only helps if the person making it understands the load paths, print direction, and where contact points actually need support.
Under-desk is usually the cleanest option
For most fixed desk setups, under-desk mounting is the best answer. The MacBook disappears, the monitor becomes the visual center, and the cable run gets shorter instead of longer.
This is also the setup with the least tolerance for sloppy design. If the mount sits under the desk, you need enough clearance to slide the laptop in without scraping. You need enough retention that it won’t shift when the desk gets bumped. And if you use a sit-stand desk or a thicker desktop, the mounting structure matters more because there’s more stress during movement.
That’s exactly where something like the SlideUnder Pro Crossbar Edition fits. It’s built for MacBook Pro 14 and 16 setups where a stronger under-desk structure makes more sense, especially on thicker desktops or sit-stand frames. Product page: https://dockedbydesign.com/products/slideunder-pro-crossbar-edition
The important part is not that it mounts under the desk. Lots of products do that. The important part is that the structure is designed around real use - repeated docking, desk movement, and keeping the laptop stable without making removal annoying.
Desk-edge mounts are better when you dock often
Some people plug in once a week. Others do it twice a day. If your MacBook moves between rooms, bags, and meeting tables, under-desk can start to feel too hidden.
A desk-edge mount solves that. You keep the machine off the main work surface, but still close enough to reach without leaning under the desk. It also makes more sense when the side of your desk gives cleaner cable routing than the underside.
The tradeoff is visibility. A desk-edge mount becomes part of the setup line, so design discipline matters more. It has to look intentional, not like a bracket from a workshop shelf.
That’s the point of a left or right-specific mount. Orientation affects access more than most product listings admit. If your dock cable comes from one side, the wrong variant turns every connection into a small irritation. The right one disappears into the routine.
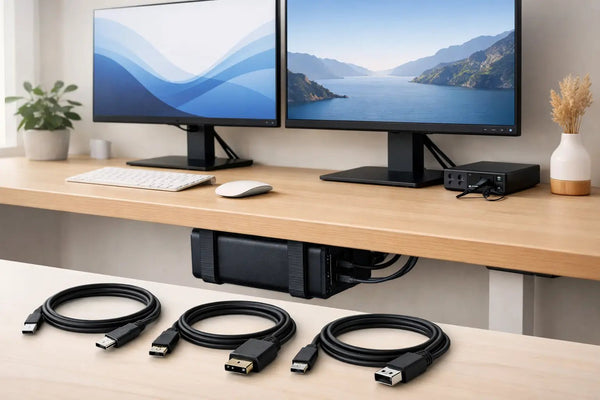
The cable matters as much as the mount
A mount can only clean up the desk if the docking path is simple. If you still need two or three cables hanging out from under the desk, you haven’t solved much.
For a lot of MacBook setups, the real goal is one cable for charging, displays, and peripherals. Mount first, then cable path. Not the other way around. If the cable is too stiff, too short, or unreliable at the speeds your setup needs, the whole thing falls apart fast.
That’s why the mount and the cable should be treated as one system. The SlideLink Pro USB4 80Gbps cable is built for exactly that kind of single-cable desk - dock once, connect everything, and stop thinking about it. Product page: https://dockedbydesign.com/products/slidelink-pro-usb4-80gbps-cable
There’s no point hiding the MacBook if the connection itself is the messy part.
Fit is not universal, and that’s a good thing
This is where generic mounts usually lose me. They promise wide compatibility by making the cavity bigger, the pads thicker, or the retention weaker. That keeps return rates down, but it’s not the same as a mount designed around a specific laptop family.
A proper MacBook mount should account for thickness, edge geometry, insertion angle, and where stress lands when the laptop is pushed in and pulled out over time. If you use a case on your MacBook, that changes everything. In many cases, it simply won’t fit correctly, and pretending otherwise helps nobody.
That kind of honesty matters. A tighter, cleaner mount is usually the better product. It just means it needs to be sold with real constraints, not broad claims.
And when the desk itself is unusual, custom work becomes the right answer. Deep aprons, non-standard edge profiles, odd clearance around a standing desk frame - these are common enough in real setups. A small workshop can actually respond to that. A mass-market listing can’t.
What to check before you buy
Start with mounting position, not material. Ask where the laptop should live when it’s docked. Under the desk is best for minimal visual clutter. Desk edge is better for frequent removal. Wall mounting works when your desk has no good underside clearance or when you want the machine completely off the workstation.
Then check your actual docking behavior. If you plug in and stay put all day, hidden placement is easy. If you undock constantly, access becomes the bigger factor. A mount that looks cleaner in photos may be worse in practice.
After that, check the desk itself. Thickness, underside obstructions, frame placement, and cable route matter more than people expect. The desk is half the product, even if nobody says it out loud.
Finally, be realistic about your tolerance for compromise. If you spent real money on the MacBook, monitor, keyboard, and lighting, the mount should not be the weak link. This is not about adding another accessory. It’s about removing one visible problem without creating two new ones.
The best setups feel boring
That’s the target. No visual noise. No fiddling. No wondering where to put the laptop every morning. The best 3d printed macbook mount is the one you stop noticing after a week because the desk finally works the way it should.
If you’re choosing one, ignore the hype and look at the fit, the docking path, and whether the person making it seems to understand the problem beyond the product photo. That’s usually the difference between a clever object and a permanent part of the setup.