Journal entry
8 Best MacBook Clamshell Desk Accessories

A MacBook in clamshell mode should make your desk simpler. A lot of setups do the opposite. The laptop gets shoved behind a monitor, the cable run looks lazy, and the "dock" becomes a pile of adapters and aluminum that takes up half the desk. The best MacBook clamshell desk accessories are the ones that remove things from sight without making the setup harder to use.
That means thinking past the usual vertical stand. A good clamshell setup has four jobs: hold the laptop securely, keep airflow reasonable, reduce cable clutter, and make one-cable docking actually reliable. If one of those breaks, the whole setup feels off.
What actually matters in a clamshell setup
Clamshell mode changes the role of the laptop. It stops being the thing you look at and becomes the computer hidden in the system. That sounds obvious, but it changes what counts as a good accessory.
A desk stand that looks nice in a product photo can still be the wrong choice if it leaves the MacBook visible, eats desk depth, or forces awkward cable bends. The same goes for giant docks with ten front-facing ports you never touch. If the goal is a clean desk, every visible object needs a reason to stay visible.
Heat matters too, but not in the dramatic way setup videos make it sound. Most people running clamshell just need decent ventilation and a mounting position that doesn’t trap the machine against a soft surface or block every vent path. You do not need a sci-fi cooling solution. You need clearance.
1. A proper MacBook mount beats a stand
For most desks, the first accessory should be a mount, not a stand. A stand relocates the laptop. A mount removes it.
If the MacBook is staying closed most of the day, under-desk mounting is usually the cleanest answer. It frees the entire desktop and keeps the machine accessible when you need to undock. That is the point of something like the SlideUnder Pro Crossbar Edition, which is built for MacBook Pro 14 and 16 setups and makes more sense than balancing an expensive laptop on a generic cradle. The crossbar design is especially useful on thicker desktops or sit-stand desks where stability and mounting position matter more than on a thin fixed top. See: https://dockedbydesign.com/products/slideunder-pro-crossbar-edition
The tradeoff is simple. Under-desk mounting is less "display piece" and more infrastructure. If you like seeing the hardware, you may prefer an edge mount. If you want the desk to disappear, under the desk is hard to beat.
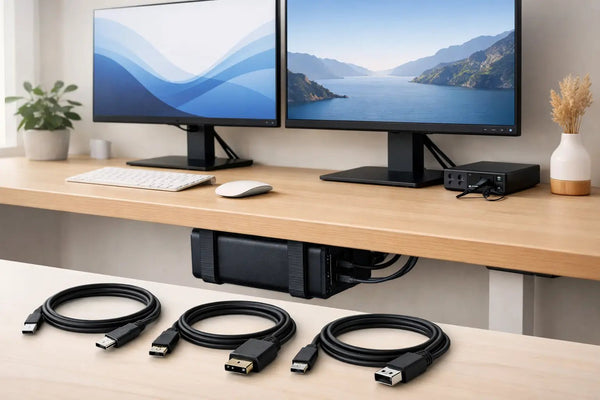
2. The cable matters more than people think
A clamshell setup lives or dies by one cable. If that cable is unreliable, under-specced, too stiff, or prone to disconnects, the whole thing becomes annoying fast.
This is why a proper USB4 cable is not an afterthought. The MacBook is handling power, display output, storage, and peripherals through a single connection. That only works cleanly when the cable is built for the load. The SlideLink Pro USB4 80Gbps cable exists for exactly this problem. It is the part that lets you dock once, connect everything, and stop thinking about the connection stack every morning. See: https://dockedbydesign.com/products/slidelink-pro-usb4-80gbps-cable
There is a boring truth here. A bad cable can make a good desk setup feel broken. Random display flicker, drive drops, charging weirdness, and intermittent reconnects often get blamed on the dock. Sometimes it is just the cable.
3. A monitor arm is better than a monitor stand
If you are using clamshell mode, the monitor becomes the center of the workstation. That makes adjustability more important than matching finishes.
A decent monitor arm clears desk space and fixes screen position properly. It also opens up the area below the display, which is where cable routing and keyboard placement usually get messy. On a shallow desk, this matters even more. You need every inch back.
The only real downside is that not every desk handles clamp pressure well, and not every monitor arm looks clean once installed. Some are mechanically fine and visually noisy. If your setup is minimal, choose one with a small base and restrained cable routing instead of a bulky "gaming" design.
4. External input devices should earn their footprint
Once the MacBook is closed, the keyboard and mouse or trackpad become permanent desk objects. That sounds small until you realize they are the things your hands touch all day.
The mistake here is buying for aesthetics first. Yes, a low-profile keyboard can look right next to a MacBook setup. But if you type eight hours a day, comfort wins. Same with pointing devices. A Magic Trackpad keeps gesture support and looks tidy. A mouse may fit your work better if you spend the day in CAD, timelines, or spreadsheets.
The desk-accessory angle is this: pick devices that reduce friction, not just visual noise. A beautiful keyboard with a bad typing feel is still desk clutter.
5. A small dock or hub is useful only if it can be hidden
A lot of clamshell setups need a dock. Fewer need to see it.
If you are constantly swapping SD cards, audio gear, or drives, some front access makes sense. But many people plug in power, display, Ethernet, maybe one USB receiver, and leave it alone for months. In that case, the best dock is often the one mounted out of sight with only the single host cable exposed.
This is where desk edge and under-desk mounts change the rest of the setup. Once the laptop is mounted cleanly, you can place the dock based on cable length and access needs instead of trying to make the whole pile look intentional on the desktop.
If your desk layout makes under-desk mounting awkward, an edge-mounted option like SlideEdge Pro can be the better fit because it keeps the MacBook accessible without wasting usable work surface. See: https://dockedbydesign.com/products/slideedge-pro
6. Cable management is an accessory, not an afterthought
Nobody wants to admit this, but cable management is usually the difference between a setup that looks finished and one that looks half-done.
For clamshell mode, the key is restraint. You do not need twenty accessories. You need a sane route for power, display, and peripheral cables, plus enough slack for movement if the desk height changes. Under-desk trays help, adhesive mounts can help, and simple ties often do more than overbuilt raceways.
What matters is planning the route around how the desk moves and how often you undock. A cable run that looks perfect but makes it annoying to remove the laptop is bad design.
7. A desk mat can help, but only if the desk still works
A desk mat is one of those accessories that can either sharpen the whole setup or make it feel staged. In a clamshell desk, its best use is practical. It defines the working zone, softens keyboard noise a bit, and visually simplifies the surface.
Size matters more than material hype. Too small, and it looks accidental. Too large, and it starts competing with the clean lines you were trying to create. If you already have a monitor arm, keyboard, and trackpad centered well, a mat can pull the setup together. If the desk is already crowded, it just frames the clutter.
8. Good lighting is part of the setup
A closed MacBook pushes all visual attention to the monitor area. That means bad lighting becomes more obvious.
You do not need RGB bars and giant fixtures. You need enough task light for the desk and enough ambient balance that the monitor is not floating in a dark room. A simple lamp with a controlled beam often works better than another USB-powered gadget clipped to the display.
This is also where wall-mounted or edge-mounted laptop placement helps. Once the MacBook is out of the way, you have more freedom to place light where it actually helps instead of working around a machine sitting on the desk.
Best MacBook clamshell desk accessories by problem
If your problem is lost desk space, start with a mount. If your problem is a messy one-cable setup, start with the cable. If your neck hurts, buy the monitor arm before anything cosmetic.
That sounds obvious, but people usually buy in the wrong order. They start with the easy accessory, like a mat or a stand, because it feels like progress. The better move is fixing the structural problem first.
For a deep desk with room underneath, an under-desk mount usually gives the cleanest result. For tighter layouts or easier side access, an edge mount can make more sense. For unusual desk thickness, non-standard clearances, or a setup that does not fit the usual dimensions, a custom build is worth asking about. That is one of the advantages of buying from a workshop that actually designs and prints the parts instead of relabeling generic hardware.
The accessories worth skipping
Some products exist mainly because desk setup culture likes buying objects. A headphone stand is fine if you truly need a place for headphones. A giant desktop dock with every port facing outward is fine if you use those ports every day. But clamshell setups are usually better when fewer things stay visible.
The same goes for cooling pads, oversized risers, and decorative stands that solve a problem clamshell mode already solved. If the laptop is closed and mounted properly, adding more hardware around it often just recreates the clutter you were trying to remove.
A good clamshell desk does not look "optimized." It looks unfinished in the best way, like there is almost nothing there. That is usually the right signal. If an accessory adds visual weight without solving a real constraint, skip it and keep the desk clear.